صمام البوابة المتسرب ليس مجرد إزعاج، بل هو إشارة إلى أن سباكتك بحاجة إلى عناية. التسرب المستمر يُهدر الماء، وإذا تم تجاهله، فقد يؤدي إلى أضرار أكبر.
الخبر السار؟ يمكنك غالبًا إصلاح صمام البوابة بنفسك. معظم التسريبات تأتي من مكانين: ساق الصمام تحت المقبض أو الختم حول جسم الصمام.
يقدم لك هذا الدليل تعليمات واضحة لإصلاح هذه المشاكل الشائعة. كما سنساعدك في تحديد متى يكون الإصلاح البسيط فعالاً ومتى يكون استبدال صمام البوابة بالكامل هو الخيار الأنسب.
وهنا ما سنغطيه:
قبل استخدام أي أداة، السلامة هي الأولوية. العمل مع أنابيب المياه دون عناية كافية قد يُسبب فيضانات، وأضرارًا بالممتلكات، وإصابات.
تحذير: قم بإغلاق مصدر المياه
- ابحث عن صمام إغلاق المياه الرئيسي في منزلك. عادةً ما يكون هذا الصمام عند مدخل أنبوب المياه. افحص قبو منزلك، أو المساحة الزاحفة، أو خزانة المرافق.
- أدر المقبض باتجاه عقارب الساعة حتى يُغلق تمامًا. بالنسبة لمقابض الرافعة، أدرها عموديًا على الأنبوب.
- تأكد من إغلاق صنبور المياه. افتح صنبورًا في أدنى مستوى في منزلك، مثل حوض القبو. اتركه مفتوحًا حتى يتوقف الماء تمامًا. هذا يُفرغ الأنبوب ويُخفف الضغط.
إن الحصول على الأدوات والمعدات المناسبة أولاً يجعل المهمة سلسة وآمنة.
| أداة/عتاد | غاية |
|---|---|
| مفاتيح قابلة للتعديل (x2) | واحدة لتدوير الصواميل، وواحدة لتثبيت جسم الصمام. |
| كماشة المفصل المنزلق | مفيد للإمساك بالمقبض أو المكونات الأخرى. |
| ساحب التعبئة أو التقاط | لإزالة مواد التعبئة والتغليف القديمة والمضغوطة. |
| فرشاة سلكية | لتنظيف الخيوط ومكونات الصمام. |
| خرق نظيفة | لتجفيف الصمام وتنظيفه. |
| نظارات السلامة | يحمي عينيك من رذاذ الماء والحطام. |
| قفازات مقاومة للماء | يحافظ على جفاف اليدين ويحسن القبضة. |
| سلسلة تعبئة PTFE | المادة الجديدة المستخدمة في صنع الختم. |
| زيت نافذ | يساعد على فك الصواميل العنيدة أو المتآكلة. |
لاختيار الإصلاح المناسب، عليك أن تعرف بالضبط مصدر المياه. صمام البوابة يحتوي على عدة أجزاء: المقبض، والساق الذي يتصل به، وصامولة التعبئة أسفل المقبض، وصامولة الغطاء الأكبر، وجسم الصمام الرئيسي.
أولاً، استخدم قطعة قماش نظيفة وجافة لتجفيف الصمام بالكامل. راقبه عن كثب لبضع لحظات. أول نقطة تظهر فيها قطرة ماء جديدة هي مصدر التسريب.
يُعدّ تسرب الماء من مكان دخول الساق المعدنية إلى صمولة التعبئة أكثر أنواع التسرب شيوعًا، كما أنه أسهلها إصلاحًا.
يحدث هذا عندما تتآكل مادة التغليف داخل الجوزة أو تجف أو تصبح فضفاضة بمرور الوقت. تُشكّل هذه المادة حاجزًا حول الساق.
يعتبر التسرب من اللحام حيث يتم تثبيت جزء الصمام العلوي في الجسم الرئيسي أكثر خطورة.
هذا يعني تلف حشية غطاء المحرك أو مانع التسرب. يمكنك أحيانًا إصلاح ذلك بفك الصمام. لكن هذا غالبًا ما يعني أن الصمام قديم ويقترب من نهاية عمره الافتراضي.
إذا وجدت تنقيطًا ثابتًا من أسفل الصمام أو رأيت شقًا في جسم النحاس، فلا يمكن إصلاح الصمام.
هذا عطلٌ حرج. ينتج عن تآكلٍ شديد، أو تلفٍ ناتجٍ عن التجمد، أو عيبٍ في المعدن. صمامٌ كهذا يحتاج إلى استبدالٍ فوريٍّ لمنع انفجاره.
بمجرد تحديد مكان التسرب، يمكنك البدء بالإصلاح المناسب. سنبدأ بأبسط حل، ثم ننتقل إلى الحل الأشمل لتسربات الأنابيب. تذكر: يجب قطع الماء في الطريقة الثانية.
في حال وجود تسريب بسيط في ساق الصمام، حاول أولاً إحكام ربط صامولة الحشو. هذه الخطوة البسيطة غالباً ما تضغط الحشوة القديمة بما يكفي لإغلاقها مجدداً.
نصيحة احترافية: اشعر بالتوتر
أدر الصامولة بمقدار ثمن أو ربع دورة فقط في كل مرة. يجب أن يكون الضغط كافيًا لإيقاف التسرب. قد يؤدي الإفراط في الربط إلى استحالة تدوير مقبض الصمام، بل قد يؤدي إلى إتلاف ساق الصمام، مما يزيد المشكلة سوءًا. يجب أن يدور المفتاح بمقاومة ثابتة، لا بقوة مفرطة.
إذا لم يُفلح الربط أو كان التسريب كبيرًا، فإن مادة التغليف مهترئة وتحتاج إلى استبدال. يؤدي هذا إلى إنشاء ختم جديد تمامًا.
نصيحة احترافية: كن دقيقًا ولطيفًا
من المرجح أن تكون الحشوة القديمة عبارة عن حلقة صلبة وهشة أو مادة ليفية مضغوطة. ارفعها بحرص واسحبها للخارج قطعة قطعة. تحلَّ بالصبر. تأكد من إزالتها بالكامل. لا تخدش السطح المصقول لساق الصمام النحاسي. قد تُشكّل الأخاديد العميقة مسارًا جديدًا لتسرب الماء.
أحيانًا لا يكون إصلاح صمام البوابة الحل الأمثل على المدى الطويل. معرفة الوقت المناسب للانتقال من الإصلاح إلى الاستبدال يوفر عليك الوقت والمال ويجنبك المشاكل المستقبلية.
يتطلب هذا النظر إلى ما وراء التسريب المباشر. عليك تقييم الحالة العامة للصمام وعمره.
معظم صمامات بوابات المنازل مصنوعة من النحاس أو البرونز، ويبلغ عمرها الافتراضي عادةً من ١٠ إلى ٢٠ عامًا. قد يكون هذا العمر أقصر في المناطق ذات المياه العسيرة جدًا أو ذات التركيب الكيميائي المائي القوي. تُسرّع هذه الظروف من التآكل وتراكم الترسبات الكلسية.
استخدم مصفوفة القرار هذه لمساعدتك في اتخاذ الخيار الأفضل.
| الأعراض / الحالة | توصية | الاستدلال |
|---|---|---|
| تسرب من الساق (تحت المقبض) | بصلح | هذه هي نقطة الفشل الأكثر شيوعًا ويمكن إصلاحها بسهولة باستخدام تغليف جديد بتكلفة منخفضة للغاية. |
| الصمام قديم جدًا (أكثر من 15 عامًا) ومتآكل | يستبدل | من المرجح أن يكون المعدن متعبًا. قد يسبق إصلاح تسرب واحد عطلًا آخر، مثل تجمد البوابة أو شق في الهيكل. |
| شق واضح في جسم الصمام | استبدل على الفور | هذا عطل هيكلي غير قابل للإصلاح. الصمام معرض لخطر الانفجار والتسبب في فيضان كبير. |
| الصمام لا يغلق بالكامل (يمر الماء) | يستبدل | البوابة الداخلية أو المقعد تالف أو ملتوٍ أو مسدود بطبقة معدنية. لا يمكن إصلاح هذا الوضع بدون أدوات متخصصة، وهو غير مجدٍ اقتصاديًا. |
| المقبض مكسور أو الساق مقطوعة | يستبدل | يعد العثور على مقابض أو سيقان بديلة مطابقة تمامًا للصمامات القديمة أمرًا صعبًا وغالبًا ما يكلف ما يقرب من ثمن صمام جديد. |
إذا كان تشخيصك أو قرارك يشير إلى استبدال الصمام، فأنت بصدد الانتقال إلى أعمال سباكة أكثر تعقيدًا. يتضمن ذلك إزالة الصمام القديم بالكامل وتركيب صمام جديد.
إنه مشروع سهل التنفيذ لمن لديه بعض الخبرة. لكن توخَّ الحذر.
فيما يلي نظرة عامة على الخطوات:
إشعار هام
إذا لم تكن مرتاحًا تمامًا لهذه العملية، أو إذا كانت الأنابيب قديمة وهشة، أو إذا كان الصمام ملحومًا في مكانه، فننصحك بشدة بالاستعانة بسباك مرخص. تكلفة الفني أقل بكثير من تكلفة إصلاح أنبوب مكسور داخل جدار.
باتباع هذه الخطوات، تكون قد نجحت في التغلب على واحدة من أكثر مشاكل السباكة شيوعًا. إصلاح صمام البوابة بنجاح لا يوقف التسرب فحسب، بل يمنحك أيضًا الثقة اللازمة للقيام بمهام صيانة المنزل المستقبلية.
لقد تعلمت الدروس الأكثر أهمية لأي عمل سباكة.
تهانينا على استعادة سباكتك إلى حالتها الطبيعية واستعادة راحة بالك. الصيانة الوقائية كهذه هي أفضل طريقة لضمان نظام خالٍ من المشاكل لسنوات قادمة.
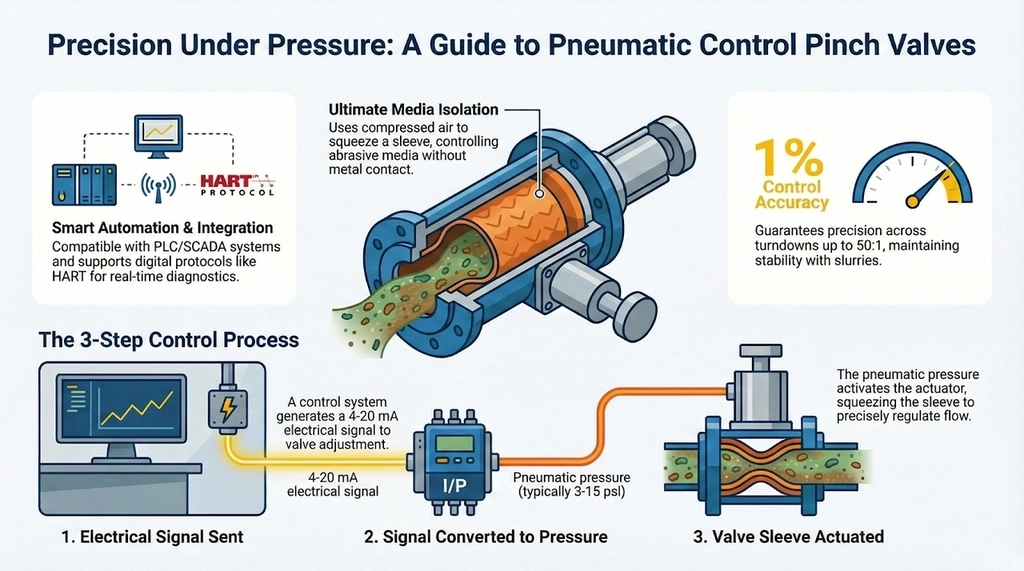
Industrial automation systems require valves that deliver precise flow control without compromising reliability in corrosive or abrasive media. A pneumatic control pinch valve excels as a modulating control valve, enabling precise flow to control pressure, temperature, or fluid levels. Using compressed air to gradually adjust the valve position allows smooth process control in mining, wastewater, […]
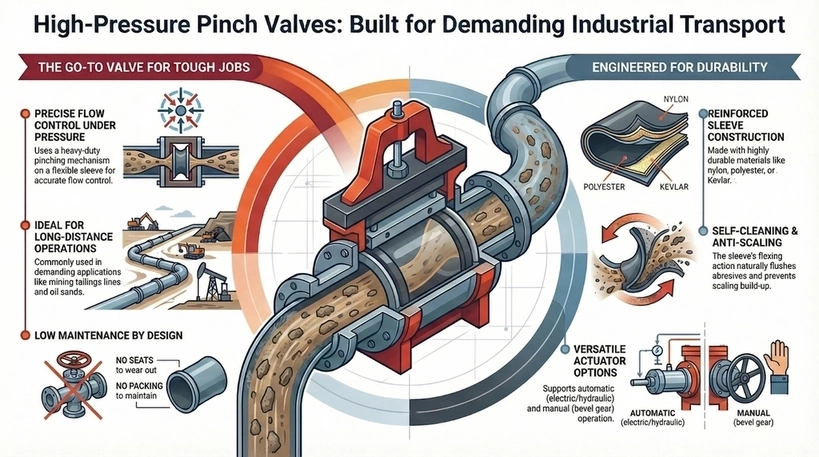
High pressure pinch valves, like PN16 pinch valve and class 150 pinch valve designs, involve a rugged and heavy-duty pinching mechanism in positioning the sleeve, resulting in an almost accurate and measurable flow of media. This kind of valve is popular and commonly used for long distance operations in mining tailings lines or oil sands, […]

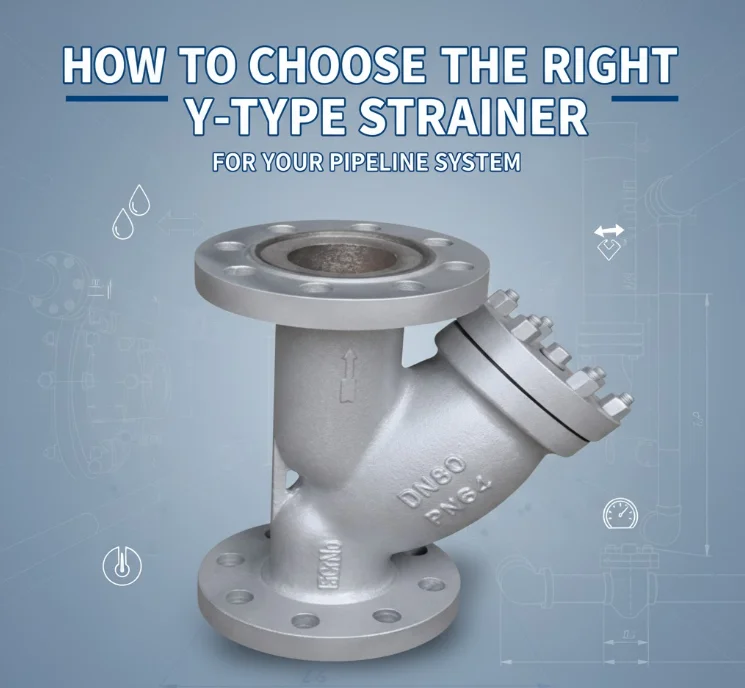
Understanding pinch valve dimensions and flanges ensures seamless integration into piping systems, particularly when choosing between DIN vs ANSI. The two are different but commonly used standards by organizations in engineering, manufacturing, and product design. DIN was developed in Germany but widely adopted across Europe and parts of Asia. Meanwhile, ANSI standards, which originate from […]

Selecting the appropriate explosion proof valve is essential for safety in industries that pose explosion risks. ATEX certified valves guarantee compliance with European standards, preventing ignition sources from heat, sparks, or static electricity. This blog explores key factors for choosing ATEX certified explosion proof valves that ensure overall operational safety, highlighting the entailed regulations and […]